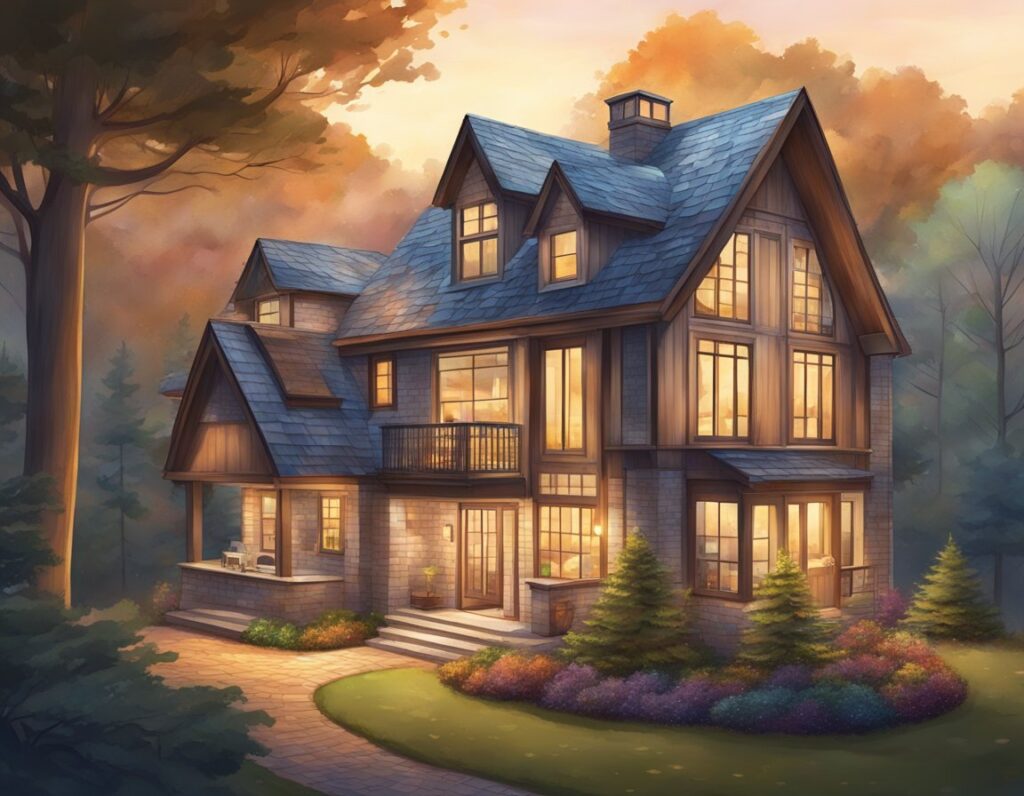
Visualising the perfect roof for your home starts with a well-drawn sketch. Whether you’re planning a renovation or dreaming of your ideal home, the ability to translate ideas onto paper is the first step in the design process.
Understanding the intricacies of roof design, from the slope and style down to the type of shingles, can transform a mere concept into a tangible plan. Grasping the techniques of drawing your vision can guide you through the initial stages of your dream roof creation.
Choosing the appropriate materials and employing the correct drawing techniques are essential in illustrating a roof that’s both appealing and architecturally sound, crucial for important roof repairs in localised areas where the inclement weather directly influences roofing styles such as roofers in Southport who rely on the best roofing materials that last the test of time. Detailed sketches provide a visual blueprint and serve as a communication tool between homeowners and construction professionals.
Furthermore, these illustrations form the foundation for translating sketches into structural plans, ensuring your envisioned design meets practical building standards.
Key Takeaways
- Sketching your dream roof serves as a foundational step in the design process.
- Precise drawing techniques are crucial for visualising and communicating your ideas.
- Illustrations must be converted into practical plans for execution.
Envisioning Your Ideal Roof

When you set out to bring your dream roof to paper, it’s crucial to pinpoint your aesthetic tastes and the practical aspects that will ensure your roof is not only pleasing to the eye but also stands the test of time.
Assessing Design Preferences
Understanding Personal Style: Your roof should reflect your personal style and the architectural character of your home.
Whether you gravitate towards the sleek lines of a Skillion roof or the traditional appeal of a Gable roof, it’s essential to choose a style that complements both your taste and the existing structure.
- Popular Roof Types:
- Gable
- Hip
- Mansard
- Flat
- Skillion
Incorporating Local Architecture: Take inspiration from the roofing styles prevalent in the UK, such as the iconic Victorian terraced houses with their pitched roofs or the stone-slated roofs found in rural areas.
Considering Functionality and Durability
Evaluating Climate: Your roof’s materials and design should withstand local weather conditions.
In the UK, where rain is frequent, consider materials like slate or tiles that offer excellent water resistance.
- Ideal Materials for the UK Climate:
- Slate: Long-lasting and traditional
- Clay Tiles: Durable with a classic look
- Concrete Tiles: Cost-effective and versatile
Anticipating Maintenance: Consider how much time and resources you are willing to invest in maintenance.
Some materials may require more upkeep than others, impacting the longevity and appearance of your roof over time.
Materials and Tools Required

When embarking on the journey to illustrate your dream roof, sourcing the right materials and securing the essential tools are critical steps. These will form the foundation of your roof illustration project.
Choosing Appropriate Materials
Your choice of materials for drawing roof shingles should be influenced by the type of shingles you envision for your roof.
In the UK, common shingle materials include asphalt, composite materials, and in some cases, clay or concrete tiles for a more traditional aesthetic. For your illustration, select a medium that best replicates the texture and colour of these materials:
- Asphalt Shingles: Pencil or charcoal can effectively convey the granular texture.
- Composite Shingles: Watercolours or coloured inks may represent the mix of materials.
- Clay or Concrete Tiles: Acrylic or gouache paints work well to mimic their solidity and range of colours.
Essential Tools for Roof Sketching
To accurately sketch a roof, you’ll need a set of tools tailored to architectural draughtsmanship:
- Drawing Surface: A smooth, A3 size heavyweight paper, preferably with a slight texture, will provide a solid foundation.
- Drawing Implements: A variety of mechanical pencils (0.5mm to 0.7mm), fine liners, and erasers (kneadable and plastic) for precise lines and corrections.
- Colouring Tools: Depending on the chosen materials, a selection of watercolours, coloured inks, or paints will bring your shingles to life. Use a palette to mix colours accurately.
- Ruler and Set Squares: For straight edges and consistent angles, a metal ruler and a set of set squares are indispensable.
- Protractor or Angle Measure: This is essential for drawing accurate roof pitches.
- Compass: For drawing consistent arc shapes, especially if your design features rounded shingles.
Organise your workspace, ensuring you have everything within easy reach, and you’re ready to bring your dream roof from concept to illustration.
Drawing Techniques and Tips

Mastering the illustration of a roof not only involves understanding the basic principles of drawing but also applying techniques that bring your sketches closer to reality. In this section, we’ll explore the fundamentals of drawing roofs as well as methods to inject life into your roof illustrations.
Basic Roof Drawing Principles
When you begin to sketch a roof, your primary focus should be on grasping the basic structure and perspective.
Roofs are typically drawn using geometric shapes, such as triangles for gabled roofs or rectangles for flat designs. The key is to establish:
- Two-Point Perspective: Begin by drawing your horizon line and identifying two vanishing points. This will ensure that all elements of the roof converge realistically at these points.
- Construction Lines: Use light, easily erasable lines to construct the basic shape. This framework guides the detailing that follows.
Enhancing Realism in Roof Illustrations
To enhance the realism in your roof illustrations, consider the following:
- Texture and Detail: Shingles or tiles can be suggested with repetitive, structured lines. Pay attention to the way these elements follow the form of the roof, showing curvature and perspective.
- Shadows and Highlights: Use shading to indicate depth and the three-dimensional form of the roof. Highlights where the light hits and shadows under overhangs add to the realistic appearance of your illustration.
- Refinement: Gradually refine your drawing by adding more layers of detail. Consider the materials you are attempting to represent and use appropriate strokes to mimic textures like slate, tile, or thatch.
By being meticulous with perspective and detail, you can create a convincing and professional roof illustration that stands out.
Translating Sketches Into Structural Plans
Effective communication between your initial roof design and the final structural plan is crucial. This transformation of creative concepts into practical blueprints necessitates meticulous attention to detail and adherence to structural requirements.
From Illustration to Blueprint
Your initial sketches are a creative expression of the desired outcome. To translate these into formal blueprints, you’ll need to employ CAD software, such as SketchUp, or engage with an architect who can interpret your vision into a technical drawing.
These blueprints are essential as they will be used to guide the construction process, ensuring that your ideas are structurally sound and can be realised in the physical world.
- Sketch Conversion: Transform hand-drawn sketches into precise digital plans.
- Detailing: Every element, from the ridge of the roof down to the eaves, must be accurately depicted to scale.
- Approvals: The blueprints will require approval from relevant authorities, aligning with UK building regulations.
Incorporating Technical Details
Your blueprint must encompass all structural and building aspects, including the specifics of materials and calculations for load-bearing capacity.
In the UK, it’s imperative to consider the weight of the roofing materials and the potential for weather-related stress.
- Structural Elements: Specify beams, rafters, and trusses to support the roof.
- Insulation and Ventilation: Detail “warm” or “cold” roof constructions as per UK building codes, ensuring appropriate insulation above or below the structural deck.
- Clash Detection: Utilise 3D modelling to anticipate and resolve any potential issues with intersecting architectural features.
By rigorously converting your illustrations into comprehensive structural plans and integrating the necessary technical details, you lay the foundation for a successful construction process.
Final Touches and Presentation
Before you present your roof design, it’s essential to refine the architectural details and choose an effective method to showcase your concept clearly.
Refining the Roof Design
To ensure your roof design is faultless, meticulously review the drawing for any inaccuracies. Key items to consider include:
- The correctness of scale and perspective, particularly the angles at which your roof slopes intersect.
- Material texture representations, such as the typical appearance of shingles or tiles.
- Realistic depiction of how water runoff is managed by the design.
Cross-check the measurements of pitches and slopes to avoid any practical issues during construction. If colour is part of your illustration, confirm that it matches the chosen materials to provide an accurate visual cue for the finished construction.
Presenting Your Roof Concept
When presenting your roof concept:
- Use high-quality visuals. This might mean:
- A3/A4 presentations of the drawings.
- A digital slideshow, perhaps in 3D, for a dynamic view of your concept.
- Anticipate questions regarding construction feasibility, materials, and cost implications. Prepare to justify your design choices with solid reasoning.
- Ensure your presentation allows for interactive engagement. Be ready to amend parts of the drawing in real-time to reflect the feedback you receive.